Salon Workflow Guide: 3D Silicone Nail Mold Use
Learn how a 3D silicone nail mold streamlines salon services — from prep through curing to finishing embossed charms.
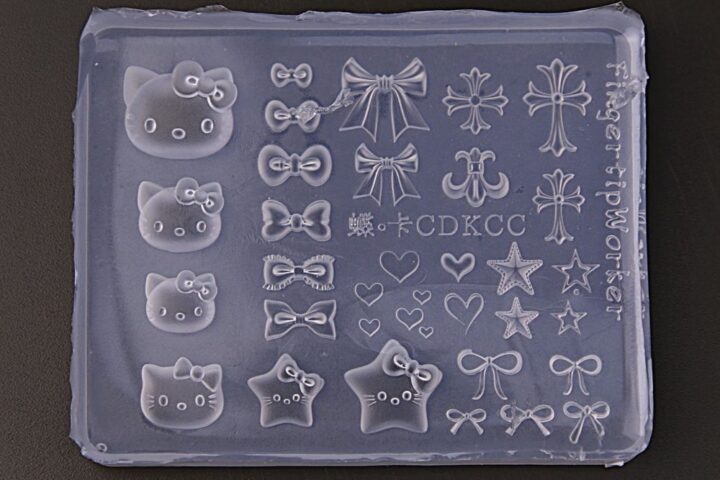
Adding consistent, on-demand 3D embellishments to services can lift ticket averages and client satisfaction. A 3D silicone nail mold gives nail technicians a repeatable way to produce embossed charms — flowers, bows, hearts and more — without lengthy freehand sculpting. This guide shows how to weave a clear silicone charm mold into a professional manicure or sculpting routine so you can keep pace with appointments while maintaining a polished result.
Where the mold fits into a typical salon service
Think of the mold as a pre-made detail station. After your standard prep—cuticle care, surface dehydrate, and base application—you can create small 3D pieces while other steps are curing or during client downtime. Keep a set of small tools and a 3D silicone charm mold ready at your station so charm production becomes a parallel task, not a bottleneck.
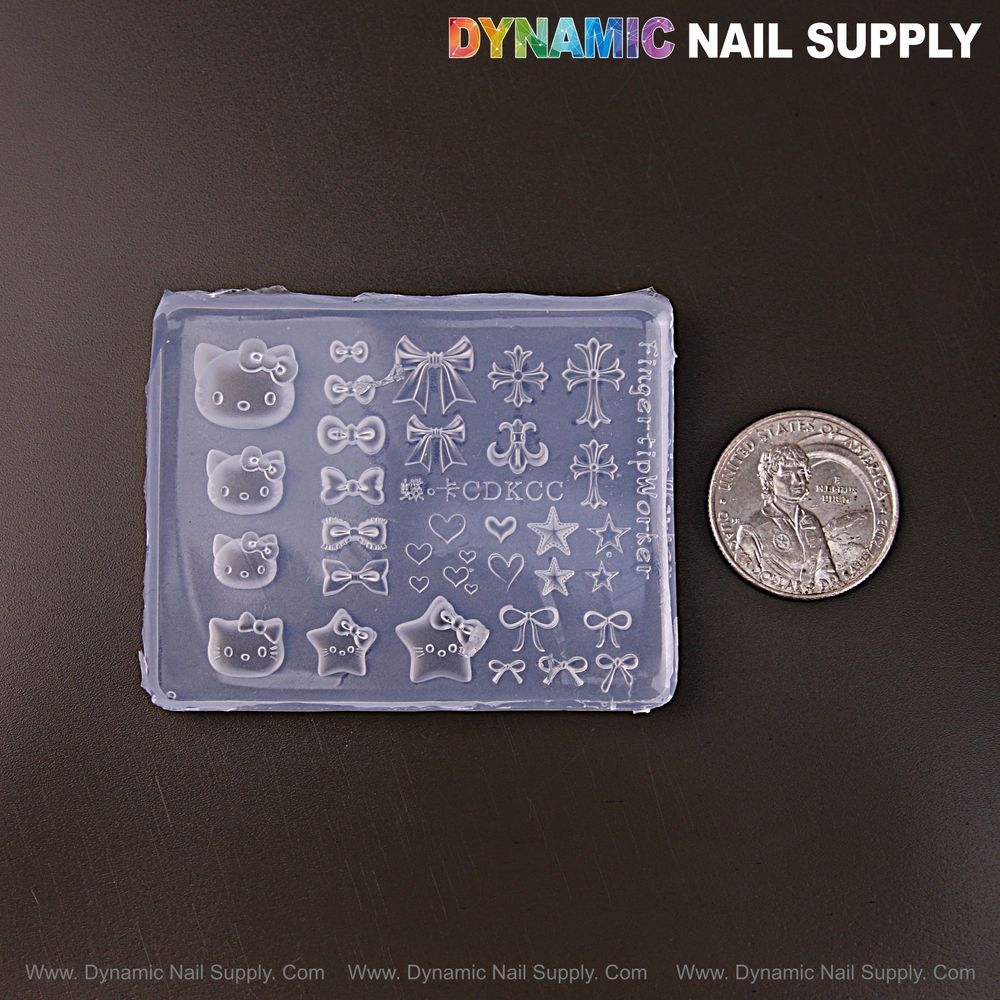
Step-by-step workflow for producing and applying charms
1. Prep the mold and workspace
- Start with a clean, dry silicone mold; remove dust with nail cleanser or rubbing alcohol.
- Organize sculpting gel, solid gel or chosen material, a scraper card, tweezers and a lamp within reach.
2. Fill, level and cure
Deposit your chosen material into the mold cavity, using a dotting tool to guide product into fine details. Hold the scraper at about a 45° angle and remove excess gently so embossed details stay crisp. Cure under a UV/LED lamp for 30–60 seconds, adjusting time to match the product you use.
3. Demold and position
Flex the soft, clear silicone from the edges to release the cured charm; use tweezers to pick it up. Position and glue the piece onto the nail or press-on base, then seal edges with top coat. Finish curing the assembly for 60–90 seconds as recommended.
Key features in salon context
- Ultra-thin, flexible design: The mold lays flat and is easy to handle, letting techs work quickly and keep accurate fills.
- Fine detail capture: Crisp embossed patterns cut down on sculpting time and produce consistent, photo-ready charms.
- Multi-material compatibility: Use sculpting gel, solid gel, gel polish, acrylic or UV resin depending on your service and desired durability.
- Reusable and washable: Durable silicone that can be cleaned between uses keeps your hygiene routine straightforward and economical.
Integrating charm production into appointment flow
To avoid adding chair time, make charms during natural pauses: while base layers are curing, during client consultation, or between steps on another hand. Keep a small buffer of pre-made charms in a clean container for quick application on short-booking services. For busy days, creating multiple charms at once maximizes lamp use and reduces repetitive setup.
Practical salon tips and tricks
- Use a thin nozzle or carving pen to reach tiny cavities without overfilling.
- Combine colors, chrome powders, or small rhinestones before final curing to achieve custom looks in one pass.
- Label molds or keep separate trays for seasonal designs so techs can grab the right style under time pressure.
- Store molds flat and shielded from direct sunlight to preserve their flexibility and shape.
Who benefits most from this tool
Technicians offering intricate nail art with predictable timing will get the largest ROI. The mold works well for both experienced nail artists who want to speed up repetitive elements and for newer techs who need a reliable way to produce clean 3D accents. It’s also useful when building custom press-on sets or adding small decorative elements to client requests.
Care, cleaning and safety notes
- Always clean the mold thoroughly between uses with alcohol or a nail cleanser and let it dry completely before refilling.
- Avoid stretching the silicone excessively when demolding; flex from the edges to protect delicate designs.
- Keep molds away from sharp tools that may nick the silicone and shorten its usable life.
- When using different materials in the same mold, clean between materials to prevent contamination or color transfer.
At a suggested retail price of $4.99, the mold is an affordable add-on that can increase customization options and average ticket value when used strategically in the salon. Dynamic Nail Supply carries this mold among their tools for professional use.
Conclusion: small tool, big impact
When integrated thoughtfully into your service flow, a 3D silicone nail mold becomes a time-saving asset that raises the level of your designs without extra sculpting skill. Use it to produce consistent charms during downtime, keep your station organized for fast access, and follow simple cleaning and demolding practices to extend the mold’s life. With a handful of prepared pieces and a clean routine, you can offer more complex 3D looks without stretching appointment times.